Teacher Ideas

Teacher Ideas
FUN365

Printables & Freebies

Printables & Freebies
Teacher Resources

Classroom

Classroom
Classroom Ideas

Get your Monday started right with a back to school freebie for your classroom!


We are so excited about our Back to School is a Hoot kit we decided to give away a couple freebies to start your Monday off right! Many of you will be headed back to the classroom in just a few short weeks. Some of you are probably already working hard getting things cleaned up and organized in your rooms. Well simply sprout would like to give you a couple freebies to use to start your school year off right.

Just right click and save the image below. You can use it on the backs of your student chairs, on treat bags or whatever else you have in mind. Insert it into a word document and drag the corners to resize as needed.

This organizational printable is a must for every classroom. I worked at a school where afternoon dismissal was different every day, some days kids rode the bus others they walked and other days they went to after school. This poor teacher could barely keep up! So I created this to help me keep it straight. I kept a clipboard and had 5 of these dismissal pages on it labeled Monday, Tuesday, Wednesday, Thursday and Friday. I carried it with me every afternoon. I knew just where my little kids were and how they got home each day. It was also a very valuable tool when I was out, I had several subs comment on how easy it was for them to get everyone where they needed to be!


If you like our freebies be sure to show us some comment love below and sign up to become a follower of our new simply sprout store you can also follow us here on our website for the latest in classroom design, activities and more! We will be adding more freebies as well as lots of content printables for the classroom.

Also be sure to sign up for our 20,000 view giveaway


Classroom Freebies Manic Monday
5

Mommy & Me Mondays: Learning on the Go


Let's face it.  We're on the go a lot these days, and sometimes precious moments spent with your children are in the car, at the grocery store, or sitting at a ball field.  Thankfully life doesn't keep us at home, but instead challenges us to get out there and experience things.   Recently I found myself for the first time taking my son to a doctor's appointment with me.  Oh he's been to plenty of his own, but this was my appointment.  We are lucky enough to have a lot of loving grandparents around that are itching for a chance to watch him, so I usually go solo to see my doctors.  I knew it would be an "experience" if I didn't think ahead.  


Last week I noticed some great flashcards in the $1 section of our local Target.  My favorites were a Dr. Seuss counting card game, Dr. Seuss alphabet cards (that have corresponding pictures and words to our favorite Dr. Seuss ABC book), and beautiful animal cards.  Because my almost two year old isn't in to playing card games quite yet, I hole punched the set and strung a ribbon through it.  That way it gives us counting cards on the go.  Also, on the go are some color cards.  Notice that they are just some paint cards from the hardware store.  I labeled the colors (orange and not apricot light...way to confusing!) and tied them together.

There are a variety of learning activities that you could do with cards like these.  The animal cards with their facts on the back could be used for classifying.  Have children sort by color of animal, size, mammals, habitat, etc.  The abc cards could be used to construct funny stories with the words listed.  Have older children use the paint cards to write a short story using juicy adjectives (The apricot colored sky filled our home with a warm glow.).  I even had my five year old niece while waiting for church to start doing simple multiplication and division with the pictures on the number cards.  


Make the most of your time together, even if it is waiting to see the doctor.  Tuck sets of cards like these in a zipper pouch and keep them in your purse or car.  That way you're prepared when traffic strikes, the restaurant wait is too long, or just when hanging out!

By the way, we survived the doctor's appointment.  He was a champ and flirted it up with all the nurses!


2

Teachers head back to school in style with cute classroom decor kits from simply sprout!


We have been hard at work over the past few weeks designing away trying to create the perfect classroom designs to bring your learning space to life! My favorite part of starting the school year was the chance to recreate my classroom design. I would get giddy the moment I saw Wal-mart start to set up for back to school. The colorful folders and composition notebooks were enough to send me overboard with ideas for a colorful new classroom design......but sadly this is the first year, in over 10 years I will not be heading back to school with the rest of my friends. So instead of spending my time decorating a new classroom I have decided to share my passion for a creative classroom with you. The first design I created is perfect for any classroom colorful shades of green, fuschia, teal, orange and yellow polka dots are combined with adorable owls to bring you Back to School is a Hoot! This 98 page kit features a variety of items perfect for any classroom.   
A classroom newsletter template
How we get home transportation cards (bus rider, after school, van, walkers, car pickup)
Blank labels for cubbies or supply cabinets (3x5) and (3.5x10)
Blank sign (perfect for class rosters, welcome signs etc.)
Nametags for student desks
ABC's for a word wall or ABC chart
Blank round signs
Pennant signs with owls and ABC's, perfect for making your own bulletin board headers or welcome signs (just hole punch and string together with ribbon)
8.5x11 learning center signs ( Math center, writing center, language center, reading center, art center)
Supply labels for classroom supplies
Table signs ( Table 1, 2 ,3 & 4)
Large number signs ( 1 - 20)
Small number signs ( 1-20)
Open house sign in sheet
Open house wish list tree and owls (for parents to take at open house to donate supplies to the classroom)
8.5x11 binder covers (blank, data notebook, grade book, lesson plans, sub plans, progress monitoring, common core, parent communication)
Afternoon dismissal chart
2 page lesson plan template


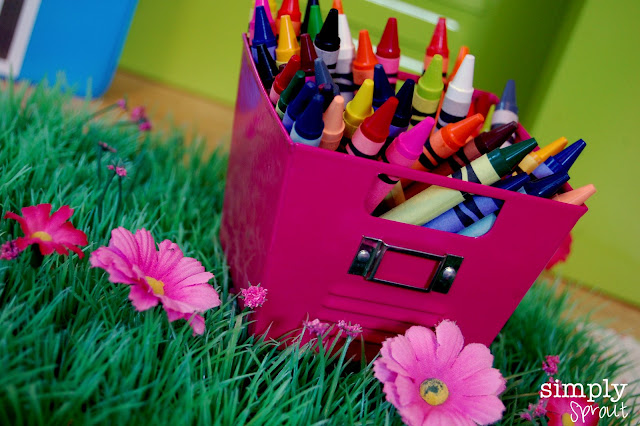
Cute little locker storage containers found in the $1 section at Target are the perfect little organizers for crayons and smaller items.


The cute colorful number chart comes in two sizes. The smallest size is shown above. The larger ones would be perfect for a number wall, the smaller ones ideal for a smaller counting chart. Blank owls are also provided for you to add your own numbers or words to.


One of my favorite additions to any classroom are colorful tissue pom poms. They are easy and inexpensive to create. All you need is some colorful tissue paper (I like buying mine from Target in the gift wrap section for just 99 cents).  You cut tissue paper into a square and then fold it like a fan. Tie a ribbon in the center for hanging.  Use scissors to cut a pointed triangle on the ends and then peel apart the layers revealing your pom pom. These are great for bulletin boards, hanging above tables, or lining the wall to add some much needed color to drab concrete block walls often found in classrooms.


These cute welcome to school circles were made by adding my own text to the existing templates found in the printables kit.


Use an online program to convert your PDF to a word document (there are several free versions out there).  Once in Word draw a text box, right click on it, and click format.  Choose lines, click no color, and no fill so the text box is clear.  Add your desired text.  I used Howser and Love you like a Sister.  This way you can create your own custom labels for your classroom, binders, boxes, cubbies, etc.
 

I found these two great locker storage bins at Joann Fabrics last year and they were just perfect for me to use for putting my papers in that needed to be graded or filed.


To compliment this kit I used a tree and owl cutout from Carson-Dellosa.  I used the pennant banners to make an ABC sign.   All you need to do is just print, hole punch, and attach with colorful ribbon. These pennant letters are perfect for bulletin boards, welcome signs, etc.  In the kit there are letters A - Z and a few blank ones with the colorful owls on them.


This cute over-sized clothespin was found at Target in their $1 section.  The colorful striped frame is magnetic and just 50 cents at Wal-mart.
If you don't want to take the time to customize your blank owl templates in word you can also use a white paint pen (sold in the craft department).


My best finds came from Wal-mart. They had this black chalkboard poster paper for just 97 cents. I trimmed it out using my two favorite supplies double sided tape and polka dotted ribbon. Ribbon can often be found on sale at most craft stores (especially at Hobby Lobby) and makes the perfect border trim.  It stores easily and you don't have to worry about it getting wrinkled or creased like border trim.


I always loved creating my lesson plan templates each year I liked having something that was different from everyone else. This colorful owl template is perfect for lesson planning.  You can either print and write out your plans (that is the method I prefer, there is something about hand written plans that comforts me), or use the template to type on (just remember you may have to convert it from a PDF to Word document first).
 

Creating this cozy space has me wishing I was headed back to school myself!
By the way, Wal-mart also has the cutest metal signs for just 50 cents. They have three different designs, this one was one of my faves! Will trade Coffee for gossip!

I hope you love this set as much as we do! This is just the first of many to come. so be sure to check out our Simply Sprout Store, and become a fan of our store by clicking add to favorite shops.  That way you'll be the first to find out when we add new items.  We will be creating thematic units, science and enrichment materials, bulletin board seasonal decor, organizational printables, and much much more! We also love special request so if you are looking for something specific please don't hesitate to send us a message or email us.
simplysprout@gmail.com

How do you like our new design? Leave us a comment below!


0

We made it to 20,000 views! Let's have a giveaway!

We were so excited to hit 20,000 views we decided we should celebrate........We are having a giveaway!
Enter to win one of these two back to school printable kits for the classroom.


 Enter below to be one of our winners! Winners will be announced Saturday night!
Please leave a comment below telling us your favorite kit......Back to school is a Hoot or Lotsa Dots.
a Rafflecopter giveaway

In order to be one of our winners you must be a follower of
To become a follower just click on the link above, and then click the link add to favorite shops. 
8

A Little Note: Free Lunch Note Printables

Here's a little note to let you know that we're busy bees around here!  We're working hard behind the scenes to get some classroom design and organizational ideas ready for the start of the school year.  Amanda has been brainstorming and writing, and Marcy is designing away.  To see a sneak peek of some of our back to school designs check out our Teachers Notebook site.  

We wanted to leave you a sweet note (or a few) to let you know that we're thinking of you!


These super cute lunch notes are a great way to drop a line to your favorite student during the day.  Print, cut, and pop in a lunch box or two!  You can also find them in our Teachers Notebook store for FREE!  Who doesn't love a smile or word of encouragement during the school day!?


0

Lil Sprouts Book Club: Living Sunlight


I'll be honest, it's hard for me not to judge a book by its cover.  This one, Living Sunlight How Plants Bring the Earth to Life by Molly Bang and Penny Chisholm, keeps my bad habit going.  It's beautiful inside and out.  The authors and illustrators do a wonderfully poetic job of teaching young readers about the amazing role of the sun, and what it brings to our planet.  Children will be enthralled at the power of photosynthesis, and will finish the story wanting to be better stewards of our Earth. 

This science tale made me stop and literally smell the roses, and be thankful for the sun for supplying these beautiful plants in my yard with what they need to grow uniquely wonderful blooms.  In these last couple of weeks of summer vacation I've found myself wanting to soak in all that the outdoors have to offer.  Right in your own backyard or schoolyard is a wonderland of photosynthesis magic. 


We took a look at tall trees (I love how small my son looks next to this tall pine tree), seed sacs, butterfly plants being visited by insect friends, citrus maturing, and lots of green grass.  After reading this book older children will see the connection between the sun and these vibrant green leaves.

There are a lot of great sun related science projects to do with children.  In my classroom we've made solar cookers, living photosynthesis models, visited farms, etc.  For my wee little learner at home I thought we would make some sun prints.  I had some left over sun print paper from a different project and thought we could make a nice plant picture with it. 

What you'll need:
Sun print paper (which you can find at a variety of locations like craft stores)
watercolors
the sun (free, yippee!)
flowers, grasses, leaves from the yard
a frame if you would like to display finished product

The next part is easy.  Follow the sun print paper directions and head out in the yard.  We chose a mixture of leaves, flower petals, and such to make our prints.  The directions will tell you how to handle the paper, how long to leave it in the sun, and what to do afterward.  It's really very simple! 


We decided to add some color to our one of a kind masterpieces with the use of watercolors.  I love how easy and inexpensive painting with watercolors can be.  They were a new treat for my son, and he loved it.  Here is how our sun print watercolors turned out.


I keep these cheap pop in pop out frames handy and change out the artwork inside periodically.  It allows me to enjoy the little artist's works, and also adds some color to our house.  This would be a wonderful classroom art project as well to tie together the science behind the sun.


I can't help but bring some of the sun's bounty from outside into our home.  So when we're not among the plants and trees, we can still enjoy their beauty. 

2

Mommy & Me Mondays: Painted Apple Lunch Bags

It's hard to believe that the start of another school year is just around the corner.  We're excited to team up with our friend Ashley at Frugal Coupon Living for a Back to School Bash of ideas.  Over the coming weeks Ashley will be featuring some of Simply Sprout's ideas for getting in school spirit, and not breaking the bank, before the first bell rings.


Today we are showing you an easy craft to do with your kiddos in preparation for the lunch making assembly line that takes place in a lot of households.  Have your crafty kids make a bunch, let them dry, and then store them in the drawer along with your lunch containers and such.
 
All you’ll need is:

Paper lunch sacks
Washable paint (we used red, green, and white)
Apple sliced in half
Cork
Scraps of ribbon
Hole puncher
Black marker
Paper plates

Lay out a couple of paper plates for your kids with some paint on each of them.  Show them how the apple can double as a stamp.  Have them cover the cut side of apple with paint and stamp their bags.  They can use the cork to make polka dots.  Once they’re dry you can use the black marker to finish off your design.  To make your kids' lunch one of a kind add some ribbon scraps to the top.  

This would also be a great way to decorate a teacher bag of treats for the first day!  Enjoy these last couple weeks of lazy summer days!


0

Backyard Olympics: Closing Ceremonies


We've had a great time this week sharing some simple and fun Olympic activities for you and your kids to enjoy.  It makes us happy to see children learning, creating, and playing.  To wrap up your festivities make some medals with your athletes.  We used the top of a food container, covered it with aluminum foil, and taped on some ribbon.  Nothing fancy, but it made our Olympians feel special!

It's tradition that national flags are hoisted during the Closing Ceremonies.  This would be a great time to get out some art supplies and make flags of different countries if you didn't do so earlier in the week.  Have your athletes march in with their flags, olive branch wreaths, and medals.  Unlike the Opening Ceremonies, the Closing Ceremonies allow the athletes to intermingle.  This has been going on since the 1950s and was suggested by a child to show unity throughout the nations.  Brings a tear to my eye!


We hope that you take some time this weekend or over the coming weeks to head outside and have a friendly competition of your own.  We would love for you to send us pictures or leave comments about what you did during your Backyard Olympics! 

What a great way to teach children the joy of competition, and the importance of sportsmanship.  Straight from the Olympic oath..."in the true spirit of sportsmanship, for the glory of sport and the honor of our teams".


0

The Competition Continues


Look at that form!  An Olympian in the making!  Our next Backyard Olympic events are fun for all ages.  We continued with the straw javelin throw.  I pulled out some kid sized straws and had our littlest athlete count out four of them for me.  The older competitor practiced her fine motor skills by taping them together.  It was a load of fun watching them run and try to throw the straw javelin.  This picture is a little fuzzy probably due to my laughing!


The cousins then tried to throw it back and forth to one another, and eventually like all good little boys it became a sword.  In the meantime we put on our thinking caps on to see what would make our javelin go further, and we used an additional straw as a non-standard tool to measure the distance it soared through the air.

Just like any other activity that you plan for your children or students, things don't always go the way you imagined.  Remember that children don't care.  They just want to learn and have fun doing so!  Make the most of the few minutes that you spend here and there explaining why something did or did not happen.  I can remember my Dad always saying, "for every action there is an opposite and equal reaction."  It might not have meant much to me the first couple hundred times, but the everyday science behind this theory eventually settled in my brain.  Now I'm lucky enough to teach it to kids everyday!


We left our "messy" game until the end.  It was time for cotton ball shot put.  I rolled out some brown craft paper in the yard, got a bowl of cotton balls, and a paper plate with some washable paint.  Dip the cotton ball in paint and throw!  After the Olympians throw several cotton balls each (if you have multiple kids, try using different color paints) have them do some measuring.  Who threw the farthest, how far was it between cotton balls, what is the average length of one throw?  For younger kids they can measure and make designs out of their markings.

 Here are some extension activities for different age groups:

Preschool/Early Elementary: Encourage your young ones to extend their learning by practicing their measuring and math skills as mentioned above.  In preparation for closing ceremonies you could have them do a journal entry about their Backyard Olympics.  On a piece of paper write I love the Olympics because ______________.  Have them write or dictate what they can and draw a coordinating picture.

Middle/Late Elementary: As mentioned above the cotton ball shot put is a great use of math skills for your middle and upper elementary students.  Record the measurements of the different paint spots and practice finding the mean, median, and mode.  A journal entry about why friendly competition is important, or if they are excited about the 2012 Olympics in London, would be a great segue between your Backyard Olympics and the start of the real ones next week.

Tomorrow we will be wrapping up Simply Sprout's Backyard Olympics with closing ceremonies.  So grab your togas and torches and we'll see you soon!


0

Let the Games Begin!


I know you don't see many top notch Olympic athletes compete in a skirt and flip flops, but hey this is the backyard kind!  After reading and talking about different sports that were once in the Olympics, and some that we'll see in the next couple of weeks, we started with the Paper Plate Discus Throw.  If you haven't tried it before, paper plates aren't the easiest to throw.  This made for a great mini science lesson on air resistance.  My niece tried a couple of different methods until she found one she liked. 

Now it was time to measure the distance to where the discus landed.  Since she is just heading into kindergarten it was best to use a non-standard type of measurement.  I let her choose what to use, and her tool of choice was her flip flop (knew they would come in handy!).  It's important to have children estimate first, and then find the actual measurement.


We found some old party hats around the house, and thought we could make use of them.  This is a great way to practice hand eye coordination.  Grab a small ball (ping pong type would work well, we used a plastic golf ball) and let the kids toss it back and forth to one another trying to catch it with their cone.  Once they get the hang of it they can use their cone to toss the ball to one another.


Here are some extension activities for different age groups:

Preschool/Early Elementary: Have children choose several items to use for their non-standard measurement tools (shoes, sticks, pool noodles, hands, feet, etc.).  Point out to them why it is important that we all use the same tool to measure items.  To add some creativity to your games, let them decorate their discus and cone with embellishments!

Middle/Late Elementary: This age group could design a discus that they think would go the farthest.  Have them start with a paper plate, but experiment with making adaptations to it.  Would a smaller plate go further, would one with holes slow down? By this age, students should be getting comfortable using standard measurement.  Pull out a tape measure and have them measure the distance to where their discus landed using customary and metric units.   If the cone catch is too easy for the older ones, encourage them to find other house hold items to use in place of the cone to challenge themselves.

More fun Backyard Olympic games to come tomorrow! 

0
Powered by Blogger.

Follow us